Charlie Reynolds
Part 1) Soldering
Part 1a) Soldering Prep: Turn the soldering iron on and set the knob to its sweet spot between 4 and 5 (for the classroom irons). Once the tip is hot remove any lingering solder residue onto the damp sponge. Then, the iron will be ready to use on your components.
Part 1b) After Soldering: Once you are done soldering, turn off the iron and holster the iron. It will be helpful if you you wipe off any solder residue from the iron while it is still hot.
Part 2) Current and Power
2a) Setting the multimeter
You need to check that the multimeter red prong is plugged into the 10 A fuse ( it has the symbol A), on the bottom left of the FLUKE, in order to measure current. To measure voltage and resistance, have the red prong plugged into the bottom right prong (it has the symbols V and Ω).
2b) Power through a resistor

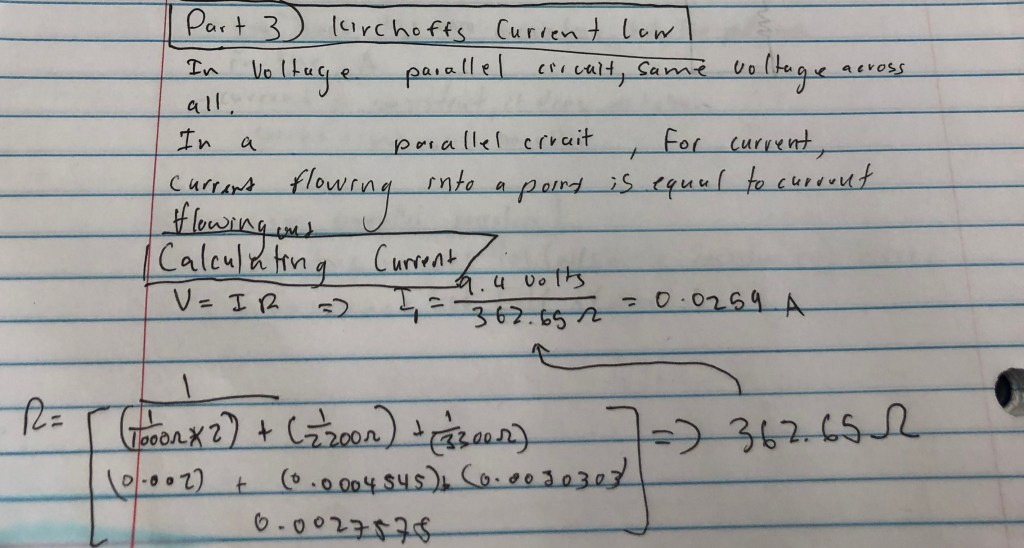
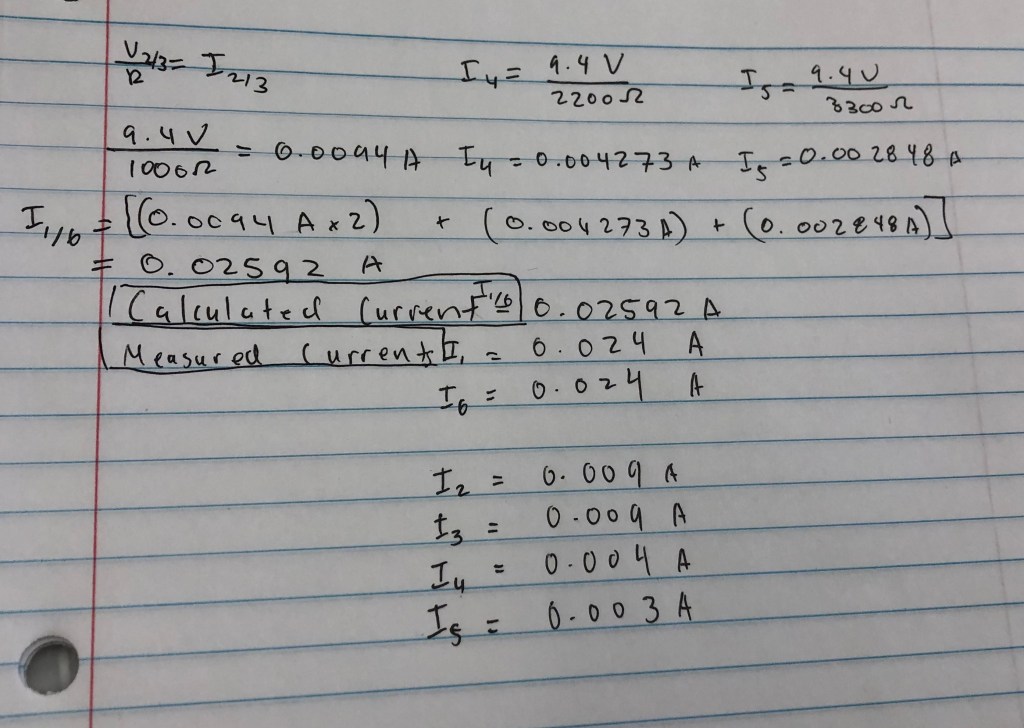
Part 3) Kirchoff’s Current Law
Troubleshooting Log:
- Soldering was slightly tricky at first, but after this lab I am more comfortable with it.
- Made a bridge between soldered pins
- When measuring the current with the resistors in parallel, I used a 330 Ω resistor instead of a 3300 Ω resistor (they have very similar color coding)
- Measuring current in this same situation, had trouble connecting the circuit with the multimeter at first
